How To Deal With Joint Words In Hindi Text And Successfully Put Them On Images Using Python
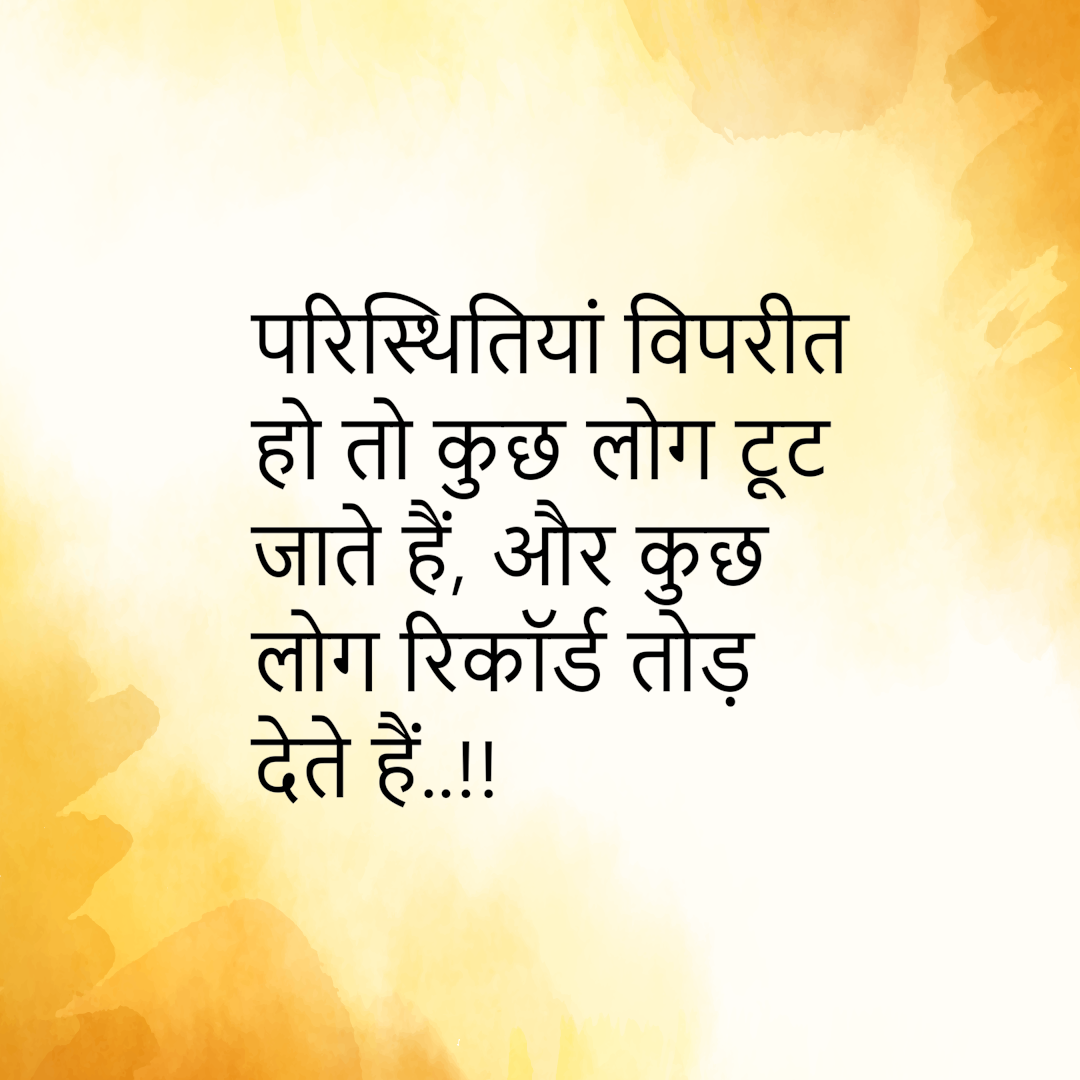 |
| Result Image |
So few days ago I was working on a task which was related to Image manipulation... Where I just have to put some random English text on an image with adjusting their parameters such as text's font, size, color... etc, and I was very much successful in doing it using python library such as pillow. So I though that it would be great that I do that thing for a different language. So I chose a completely different language that is devanagari script, which includes languages such as sanskrit, hindi, marathi..etc. Well, believe me, it wasn't as easy as I thought😅.
So I used pillow library as my tool to put some hindi text on image same as I put English text on image... But then I noticed that the spelling of the text which I had wrote is incorrect and completely change the meaning of the sentence which means that python or i can specifically say pillow library is not able to work with joint words in devanagari script.
 |
| Mistake in marathi text |
So I googled each and every page and sites just to find a completed detailed solution for this problem... I googled every possible questions such as
How can I print Hindi sentence (unicode) on an image in Python?
How to put correct Hindi/Marathi text on image using PIL in python?
Devanagari font not working in python.
How do I add Hindi text on an image in windows?
After so much research and trial and error I finally came up with a step by step guide to Put Hindi Text On Image Using Python or we can also say Put Devanagari Text On Image Using Python.
Requirerments:
- Python 3.6 or greater
- pip install numpy
- pip install pandas
Let's dive into the solution for this problem.
Step1: Install Pyvips
Pyvips don’t manipulate images directly, instead they create pipelines of image processing operations building on a source image. When the end of the pipe is connected to a destination, the whole pipeline executes at once, streaming the image in parallel from source to destination a section at a time.
Because pyvips is parallel, it’s quick, and because it doesn’t need to keep entire images in memory, it’s light.
You can check the documentations for pyvips for more details:
Now go to your jupyter notebook and type:
!pip install pyvips You can also go in command prompt and type:
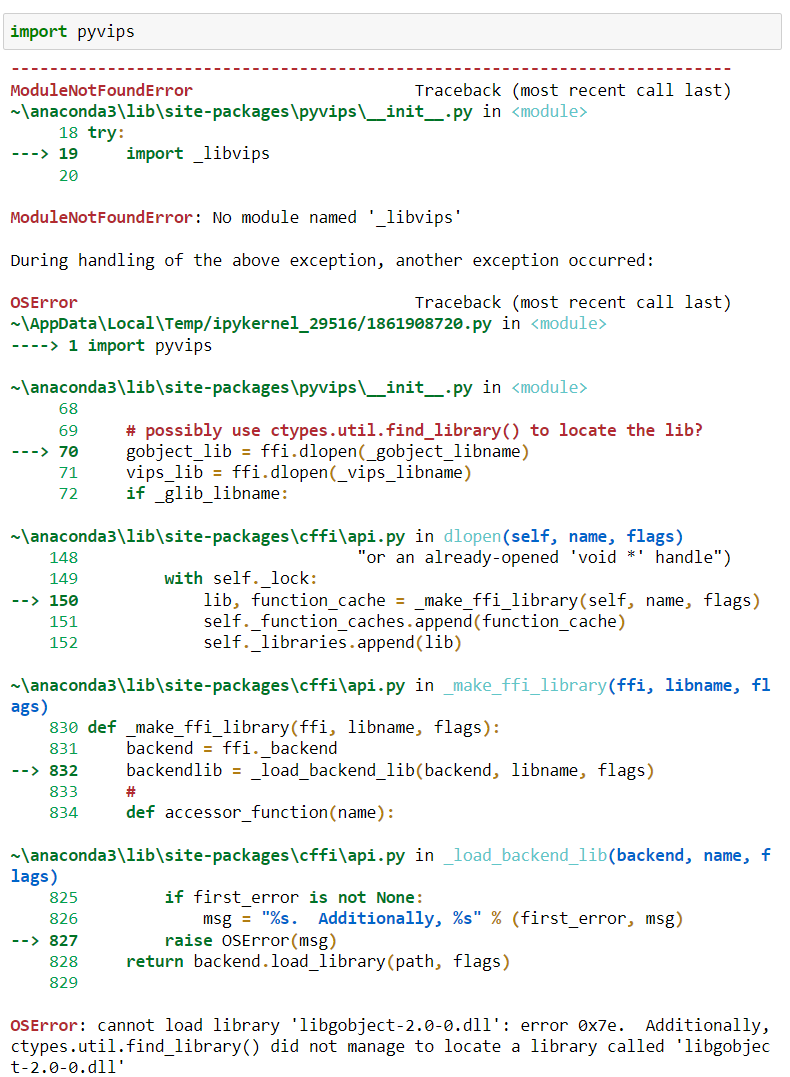
pip install pyvips Now if you go to your jupyter notebook and try to install it you will get an error from pyvips:
Step2: Download & Locate
As you are done with installation pyvips, its done hurrah we are done... Haha, just kidding I wish life would have been so easy.
Lets deal with this error OSError: cannot load library 'libgobject-2.0-0.dll': error 0x7e.
Basically this is the step-by-step guide to install pyvips and using it for image manipulation task.
Go to the following link:
https://github.com/libvips/libvips/releases
which will look some thing like this:
 |
| click on the link |
Now based on your following system download the suitable file, mine is windows10 64-bits so I downloaded that file. After click it will look some thing like this:
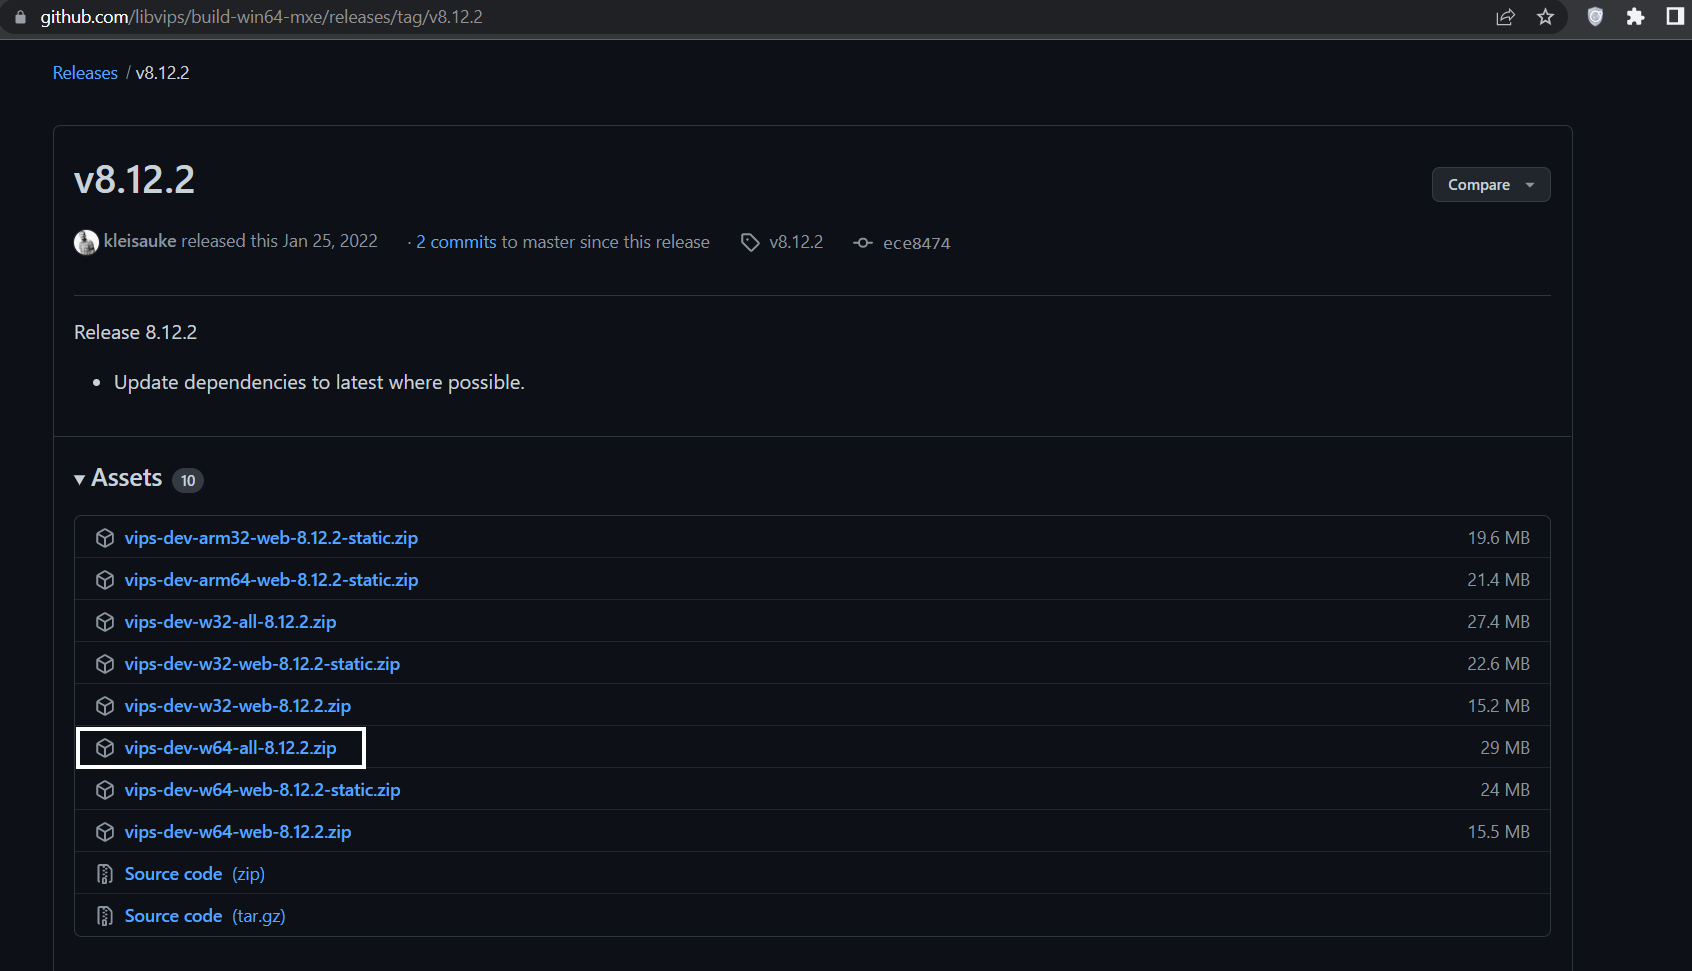 |
| https://vips-dev-w64-all-8.12.2.zip/ ...Download |
After the
downloading the file go any location and save it ==> extract the files which
will give you folder name vips-dev-8.12.
 |
| vips-dev-8.12 folder |
Step3: Setup path in environment variables
Now go to
vips-dev-8.12 ==> bin
copy it's path in my system it is in
C:\vips-dev-8.12\bin
Now go to your environment variables & paste it.
For user variables:
Righ click in ThisPc ==> Advanced System settings ==> Environment Variables ==> User variabes ==> Path ==> Edit ==> New ==> Paste ==> Ok
 |
| pasting path in user variables |
For System variables:
Righ click in ThisPc ==> Advanced System settings ==> Environment Variables ==> Sytem variabes ==> Path ==> Edit ==> New ==> Paste ==> Ok
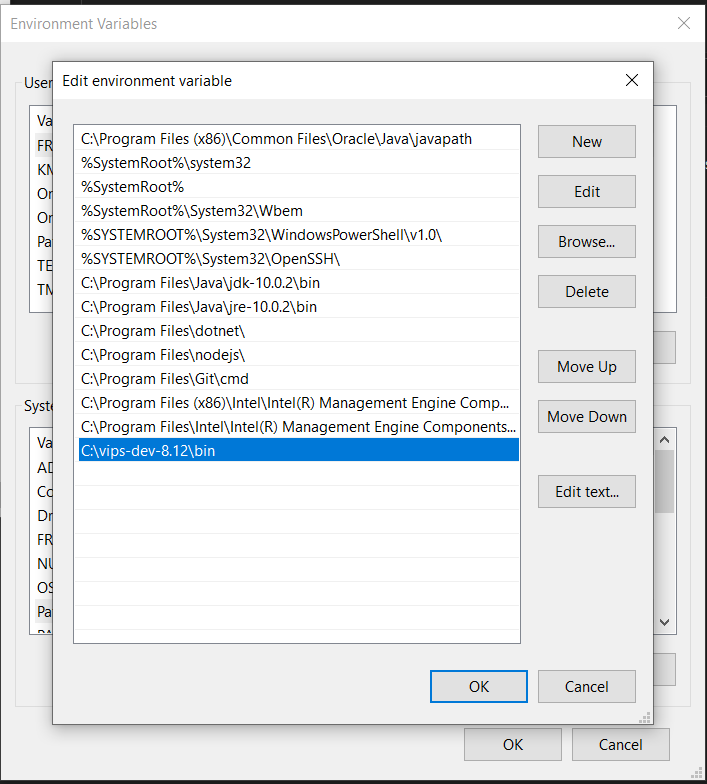 |
| pasting path in System variable |
Step4: Almost done with the process
*** Restart your system ***
Now go to your Jupyter Notebook or python file and type import pyvips and yess we did it. So we are half way though.
Now Let's start with our main contain:
 # IMPORTS

 import os
 import pyvips
 import textwrap
 from PIL import *
 import pandas as pd
 from PIL import Image
 from PIL import ImageFont
 from PIL import ImageDraw


 # MAKE A FUNCTION

 def bgoutput(filename, text):

   rendered_text, feedback = pyvips.Image.text(text,
                         font='Mangal', fontfile='Mangal Regular.ttf',
                         width=900, height=900,
                         autofit_dpi=True)

   rendered_text = rendered_text.gravity('centre', 1500, 1500)

   image = rendered_text.new_from_image([0, 0, 0]).bandjoin(rendered_text)
   image.write_to_file(f'{filename}.png')

 # GENERATE OUTPUT 1

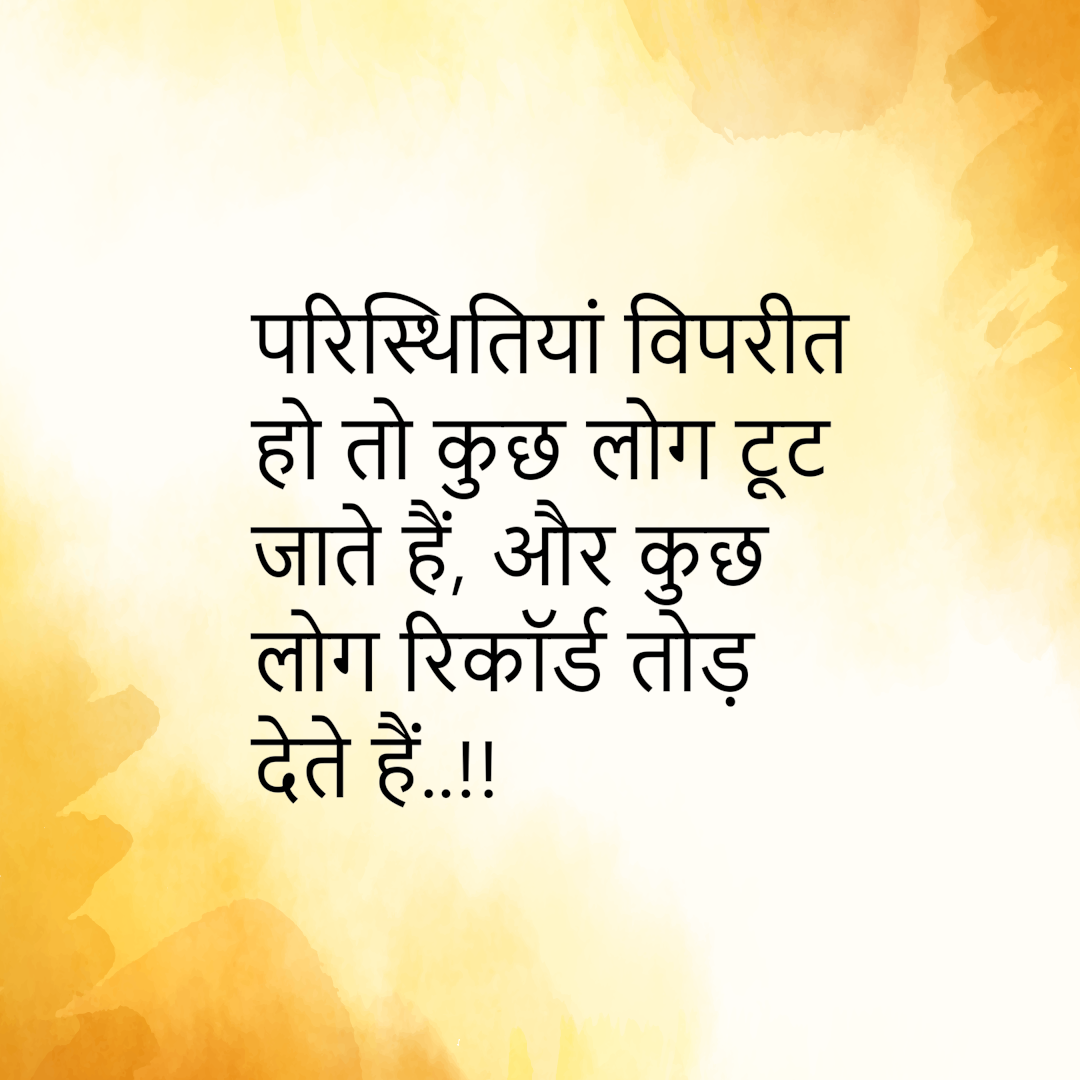
 text = "परिस्थितियां विपरीत हो तो कुछ लोग टूट जाते हैं, और कुछ लोग रिकॉर्ड तोड़ देते हैं..!!"
 bgoutput('new', text)

 # COMBINE OUTPUT 1 WITH BACKGROUND IMAGE

 img = Image.open('new.png')
 b1 = Image.open('bg_img.png')
 img = img.resize((1000,1000))
 b1.paste(img,(50,50), mask=img)

 # GENERATE FINAL OUTPUT

 b1.save("final.png")
Output:
Understand the parameters here you can tune some values and make changes based on your requirements.
Example:
out =
pyvips.Image.text(text, font=str, width=int, height=int, align=Union[str,
Align], rgba=bool, dpi=int, justify=bool, spacing=int, fontfile=str,
autofit_dpi=bool)
Returns:
out (Image): Output
image
Args:
text (str): Text to
render
Keyword args:
font (str): Font to
render with
width (int): Maximum
image width in pixels
height (int): Maximum image height in pixels
align (Union[str,
Align]): Align on the low, centre or high edge
rgba (bool): Enable RGBA
output
dpi (int): DPI to render
at
justify (bool): Justify
lines
spacing (int): Line
spacing
fontfile (str): Load
this font file
Other Parameters:
autofit_dpi (int): DPI selected by autofit



thanks a lot. I am trying to create video from images. And the first step is to paste Sanskrit text(with special chars) onto an image. This helped me. Thanks.
ReplyDeleteBasically trying to create videos like this:
https://www.youtube.com/@vedichants/videos